Pre-Application Preparation
Thorough preparation is crucial to avoid bubbles, wrinkles, or poor adhesion. Focus on substrate treatment, film preparation, and tool preparation:
- Substrate Preparation: Ensure the substrate surface (especially fluted WPC wall panels) is clean, flat, dry, and free of dust, oil, or debris. For uneven areas, use putty to level and sand gently, then wipe with a dry cloth. For fluted WPC panels, carefully clean the groove gaps with a small brush to remove hidden dust. Confirm the substrate's moisture content is below 10%-excess moisture will cause the film to peel off over time.
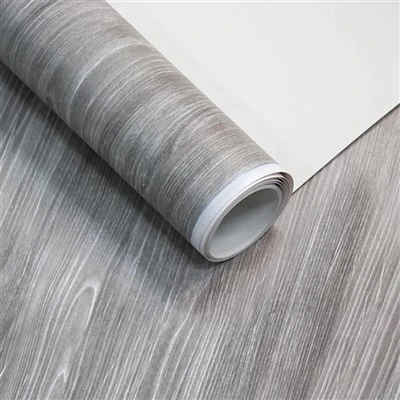
- Film Preparation: Measure the substrate's length, width, and groove depth accurately. Cut the PVC film 2-3cm larger than the substrate to reserve trimming space. Place the film in a clean environment at 15-30°C for 24 hours before use to eliminate internal stress, preventing deformation during application.
- Tool Preparation: Prepare essential tools: a plastic squeegee (or rubber scraper), sharp utility knife, measuring tape, scissors, hair dryer (or heat gun), and high-quality adhesive compatible with PVC film and WPC substrates. For fluted panels, prepare a small brush to apply adhesive evenly in grooves.
Application Methods
Adhesive Bonding (For Fluted WPC Wall Panels)
This method is easy to operate without professional equipment, making it ideal for on-site decoration of fluted WPC panels. Follow these steps:
1. Apply Adhesive: Select water-resistant, non-toxic adhesive compatible with PVC and WPC. Apply a thin, even layer on the back of the PVC film or the substrate surface. For fluted areas, use a small brush to coat the groove walls and bottom, avoiding adhesive clumping-too much adhesive causes bubbles, while too little reduces adhesion. Wait for the adhesive to reach the "tacky stage" (3-5 minutes, depending on the product) until it feels sticky but does not transfer to the touch.
2. Position and Paste: Align one edge of the PVC film with the substrate's edge, then slowly paste from one end to the other, keeping the film flat. For fluted WPC panels, gently press the film into each groove with a small scraper to ensure full contact with the adhesive, avoiding gaps between the film and groove surfaces.
3. Remove Bubbles and Wrinkles: Use a squeegee to press the film firmly from the center to the edges, squeezing out air bubbles and excess adhesive. For stubborn bubbles, pierce them with a fine needle and press again to expel air. For curved groove areas, heat the film slightly with a hair dryer (40-50°C) to enhance flexibility, then shape it along the grooves with a scraper.
4. Trim Edges: After the film is fully bonded, trim the excess film along the substrate's edge with a utility knife at a 45° angle. For fluted WPC panel corners, trim carefully to ensure neat edges and avoid peeling. Apply a thin layer of edge-sealing glue to exposed edges for moisture protection.
Hot Pressing (For Flat Substrates)
Hot pressing is widely used in industrial production (e.g., furniture manufacturing) for flat substrates like MDF or particleboard, ensuring stronger adhesion and a flawless finish:
1. Preheat Equipment: Preheat the hot press machine to 120-150°C (adjust according to film thickness-thicker films require higher temperatures). Ensure the press plate is clean and flat to avoid indentations on the film surface.
2. Position the Film: Place the PVC film on the flat substrate accurately, covering the entire surface without misalignment.
3. Hot Pressing: Place the substrate and film into the hot press, apply uniform pressure (0.3-0.5MPa), and maintain the temperature for 3-5 minutes. The heat activates the film's adhesive layer, forming a tight bond with the substrate.
4. Cool and Trim: Remove the substrate from the hot press and let it cool naturally to room temperature. Trim excess film with a utility knife for a clean, finished look.
Key Notes for Application
Temperature Control: Avoid application in environments below 10°C (adhesive activity decreases) or above 35°C (film may shrink). Use a hair dryer to heat the film when working on fluted areas, improving flexibility and fit.
Adhesive Selection: Do not use inferior adhesives, as they emit harmful gases and damage the PVC film. For humid areas (kitchens, bathrooms), use water-resistant adhesive to enhance durability.
Post-Application Care: Allow the adhesive to cure completely (24-48 hours) after application-avoid touching, pressing, or clean.